Hiển thị các bài đăng có nhãn Android. Hiển thị tất cả bài đăng

Thứ Bảy, 17 tháng 12, 2016

How To Download and Install Any Android App and Game Without Google Playstore/ Gmail Account [Video Tutorial]


How To:


In This Video I'm going to show you how to download and install any Android application and game without Google playstore and Google account...
So, let's start

1# goto "settings/security" and enable "unknown source" option

2# now open default browser and goto Google.com

3# search for any application or game you want to download *and at the end of search just type ".apk"

*Tip# apk is a file which Android able to execute and run, like our windows run .exe files

4# find "apkmirror's" link from search results and open it.

5# download application from apkmirror's website

*Tip# before download it's good to know your mobile's Android version so let's see...

*# so I have Android 6.0.1, I will download apk file which minimum support my android version... Like if someone of you have Android 4.0, he have to download an apk which support 4.0 or blow...

6# install apk manually

*Tip# you can use this apk for future use... Now it's stored in you phone/SD storage...

* You also can share it with your friends via Bluetooth or any other resource

*Note# you also can download apk file from computer and install it by transfering to you phone to storage...

You can also Download APKs from out website by going Here
Video Tutorial:


Thứ Năm, 18 tháng 8, 2016

How to create webview and load html code into that WebView using android java

     This post shares some useful information about the WebView. We will see how to create a new WebView and how to load a html code into the newly created WebView in android. In the previous post we saw about creating WebView in android studio.

In case if you missed it please click here

WebView is a view that display web pages inside an application. We can also specify html string and can show it inside your application using WebView. WebView turns your application to a web application.

To load a html code into a WebView use the following code

Code to load html code directly into WebView
String html = "<html><body>This is the test webview</body></html>";
String mime = "text/html";
String encoding = "utf-8";


WebView myWebView = (WebView)this.findViewById(R.id.myWebView);
myWebView.getSettings().setJavaScriptEnabled(true);
myWebView.loadDataWithBaseURL(null, html, mime, encoding, null);


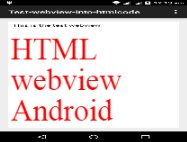
Html code into webview

Thứ Hai, 15 tháng 8, 2016

Different image for focused,pressed and normal state in android button

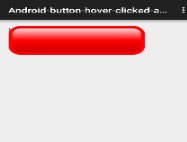
     In this tutorial we are going to learn about the android button and every state (pressed,focused and normal) of an image when placed on that button.

1) First create a new project in android studio more details...

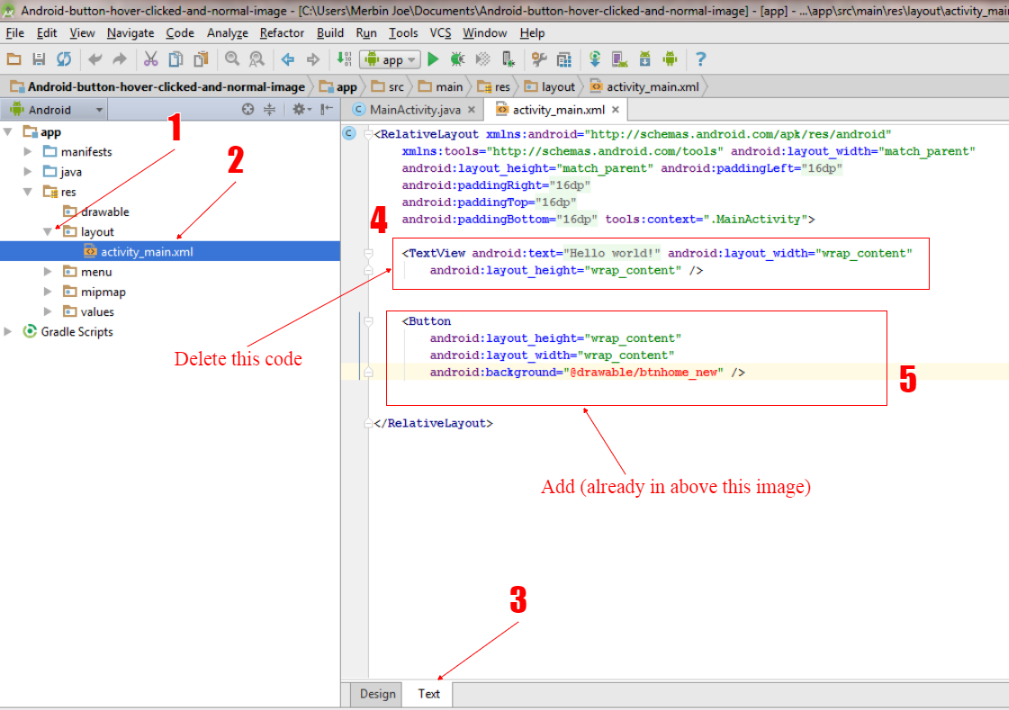
2) Remove the TextView code from activity_main.xml, create a button in your project by using the following code or tools.

<Button
android:layout_height="wrap_content"
android:layout_width="wrap_content"
android:background="@drawable/btnhome_new" />


android add button in main_activity.xml

Note:
     In the above image you can see an error @drawable/btnhome_new. This is because the program contains the file btnhome_new.xml  on drawable directory, which is not yet created.

3) Now we are going to create a file btnhome_new.xml on drawable directory.
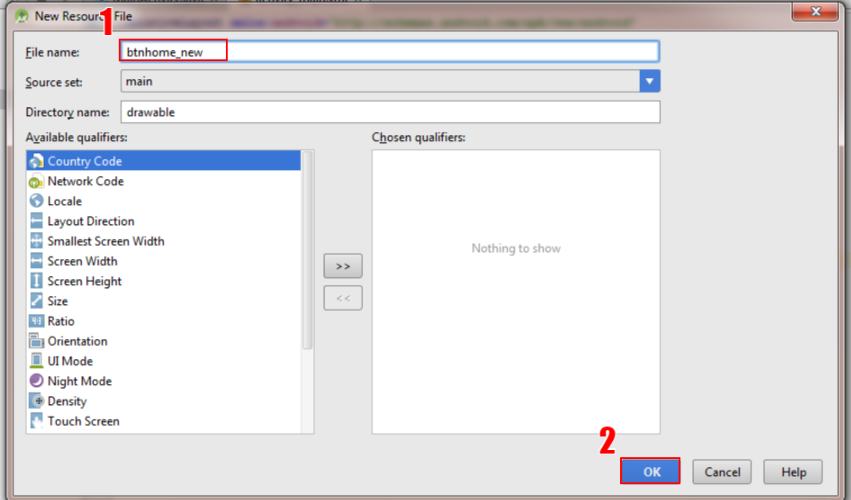
   a) Right click on the drawable directory  => New => Drawable resource file
 
Create new xml file in android

   b) Now a file is opened btnhome_new.xml just remove all the code from that file and replace with the code given below.

Note : Once we create this file the error(@drawable/btnhome_new) will be removed from activity_main.xml.

<?xml version="1.0" encoding="utf-8"?>
<selector xmlns:android="http://schemas.android.com/apk/res/android">
<item android:drawable="@drawable/btnblue"
android:state_pressed="true" />
<item android:drawable="@drawable/btnrose"
android:state_focused="true" />
<item android:drawable="@drawable/btnred" />
</selector>

Selector added in a xml file in android.jpeg

You can see some errors in this code
@drawable/btnblue
@drawable/btnrose
@drawable/btnred

 Because btnBlue.jpg , btnRose.jpg and btnRed.jpg are not in drawable directory.
  4) Now we are going to create all these files in drawable directory.

     Copy the images to drawable directory.

     Paste the copied images to drawable directory.
Paste the copied images to android drawable folder

     A dialog box will ask for confirmation, just press ok.
Paste dialog box in adndroid studio
     Now the images are placed into drawable folder, and you can see that the error has been removed.

Successfully removed the error in android

Note : Image name should not contain capital letters.


Thứ Tư, 10 tháng 8, 2016

Create first webview in android studio

     Webview is a tool in android studio and it is used to load html or website to mobile, through this we can easy to create the android application through html,css and javascript code.

1) First create a new project in android studio more details...

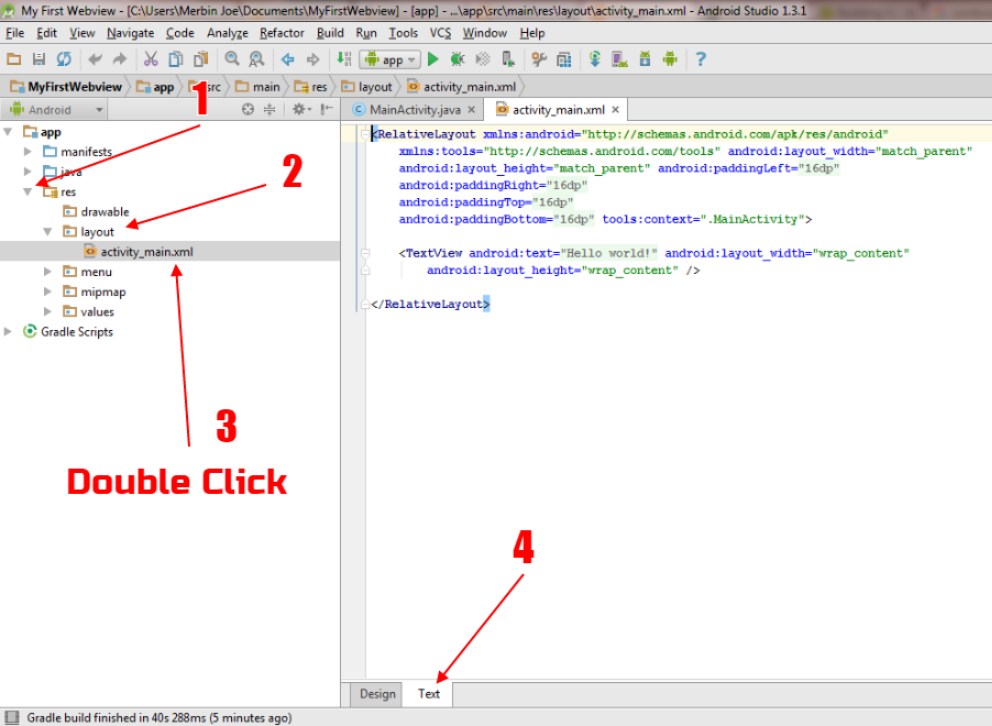
2) Open activity_main.xml file under the layout folder.

Open layout.xml file in android studio


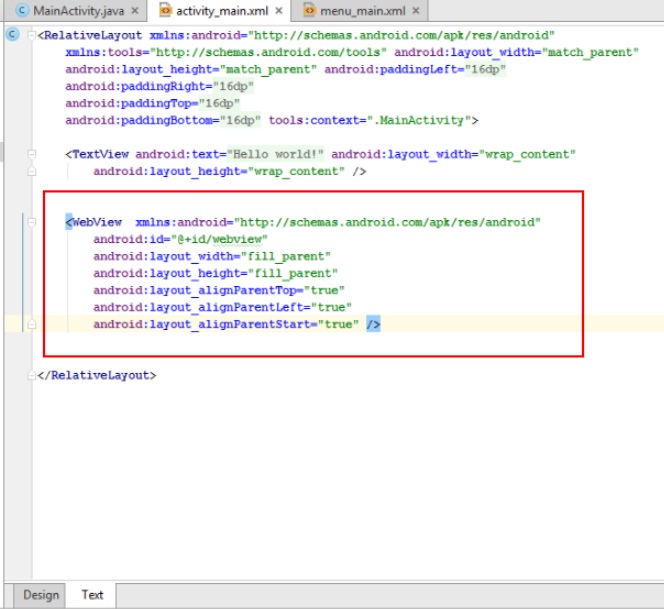
3) Copy the following code to the activity_main.xml

<WebView  xmlns:android="http://schemas.android.com/apk/res/android"
android:id="@+id/webview"
android:layout_width="fill_parent"
android:layout_height="fill_parent"
/>

xml code for creating webview


     When you add the code to activity_main.xml you can see the preview by clicking Design.


Webview Preview in design tab

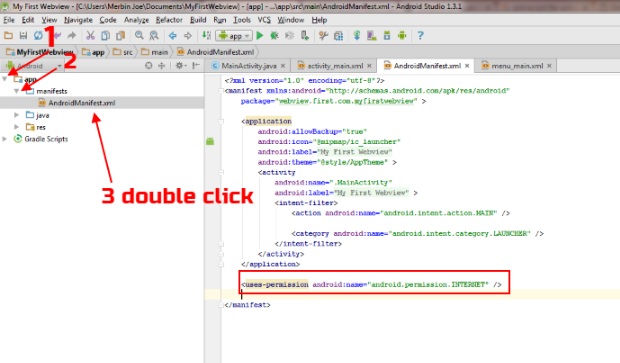
4) You must set internet permission in AndroidManifest.xml. Open AndroidManifest.xml file and enter the following code.

<uses-permission android:name="android.permission.INTERNET" />

add android.permission.Internet user permission in android

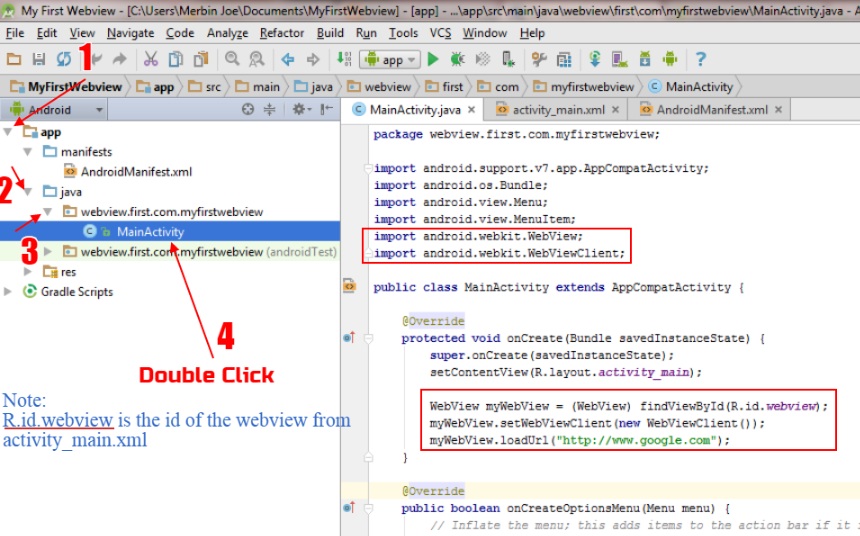
5) Open MainActivity.java file and modify it by the below steps.
  
    a) import the following class
import android.webkit.WebView;
import android.webkit.WebViewClient;

    b) When you want to load the url to your webview, just call the below code.
        WebView myWebView = (WebView) findViewById(R.id.webview);
myWebView.setWebViewClient(new WebViewClient());
myWebView.loadUrl("http://www.google.com");


Java code for webview

6) Now you are done with your first webview, just run the code.


Java code for webview final output


Thứ Bảy, 6 tháng 8, 2016

How to create new project in android studio?

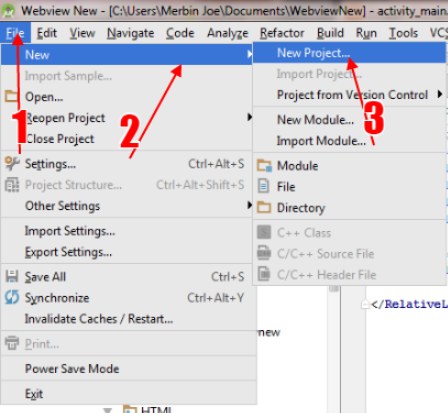
1) Open Android studio, then find the File option from the menu bar and go to New => New Project.


2) Now one new dialog box is open and ask the project details Application name, Company Domain and project location.

Application name
     No need to enter unique name compare with playstore, this name is displayed under the application icon.


Application name for android project
Company Domain
     It must be unique compare between the google play store (If you created the name and the same name already in playstore it won't show any error message, but in publishing time it will show a error).


Unique id in play store


Project Location
     It will automatically take the previous project path, if you want the same path no need to change it, or you can change.

Application directory

3) Then press Next button
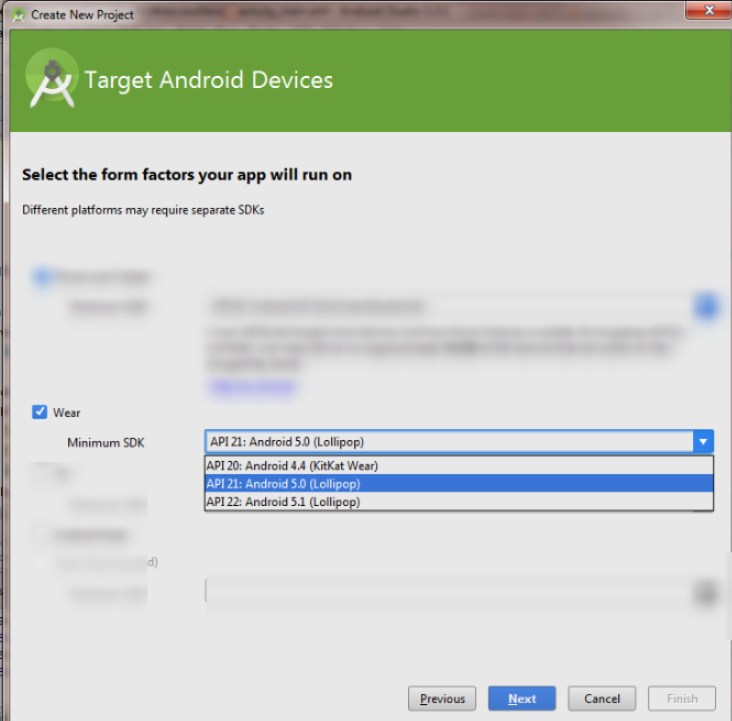
     In this window select the minimum target SDK ,wear, TV, and Android auto.

Minimum SDK
     Here you can select the minimum required android os version.

Choose Minimum SDK target version

Wear
     This mean is this application support wearable android device or not (If yes then check or uncheck it).

Wearable android device or not

Wearable device

Android TV
     It will indicate this application is applicable for Android TV.

Android TV android studio

Android tv os

Android auto
Android auto


4) Click next in this dialog box, you can find some template, if you want any templates from there you can select otherwise select "Blank Activity".

Blank Activity in android studio new project

5) Click next and enter the activity name, layout name, title and menu resource name, you can change it or leave it and just press finish button.

Final of the new project window

 6) Click Finish. Now you can write your code here.


Thứ Sáu, 5 tháng 8, 2016

How to set the SDK, NDK and JDK path to android studio?

If you want to set the SDK path  directly you can set it to in local.properties like below

sdk.dir=D\:\\Program Files\\Android Studio\\SDK


If you want to set the NDK path  directly you can set it to in local.properties like below
ndk.dir=C\:\\android-ndk-r12b-windows-x86\\android-ndk-r12b

NDK directory set in local.properties


We can set the path by selecting folder by using the below method. After open the android studio press Ctrl+Shift+Alt+S


Select NDK SDK and JDK directly from tools


Thứ Bảy, 23 tháng 7, 2016

Color Switch v3.7.0


Description:-

Over 80,000,000 downloads worldwide!
Play now the #1 addictive game of the year!
Tap the ball carefully through each obstacle and your ball will switch color with some powerups.
You must follow the color pattern on each obstacle to cross it !

Be careful not to pass through the wrong color, or you’ll have to start again.

Requirements:-

Android 3.0 and up

What's New:-

New endless mode : Jump
25 new levels
3 new balls

Previews:-


Download Link:-
Password is (if ask) : blackeyez007.blogspot.com

MX Player Pro v1.8.4


Description:-

Best Media Player for Android.  MX Player Pro is Add Free and Full Featured Media Player.
Google Play Store Price is 6$

Requirements:-

Android 4.1+ or above
For HD Movie Minimum Dual Core Processor


What's New:-

Bug fixes.

Added an option for selecting action on headset disconnected under Settings > Audio.

Previews:-


Download Link:-
Password is (if ask) : blackeyez007.blogspot.com